
Eye Enhancing
Hello everyone!
If you wish to learn how to enhance your eyes and maybe trick having great graphics, continue reading on with this easy tutorial!
Program Used: Gimp (Easily translated to Photoshop)
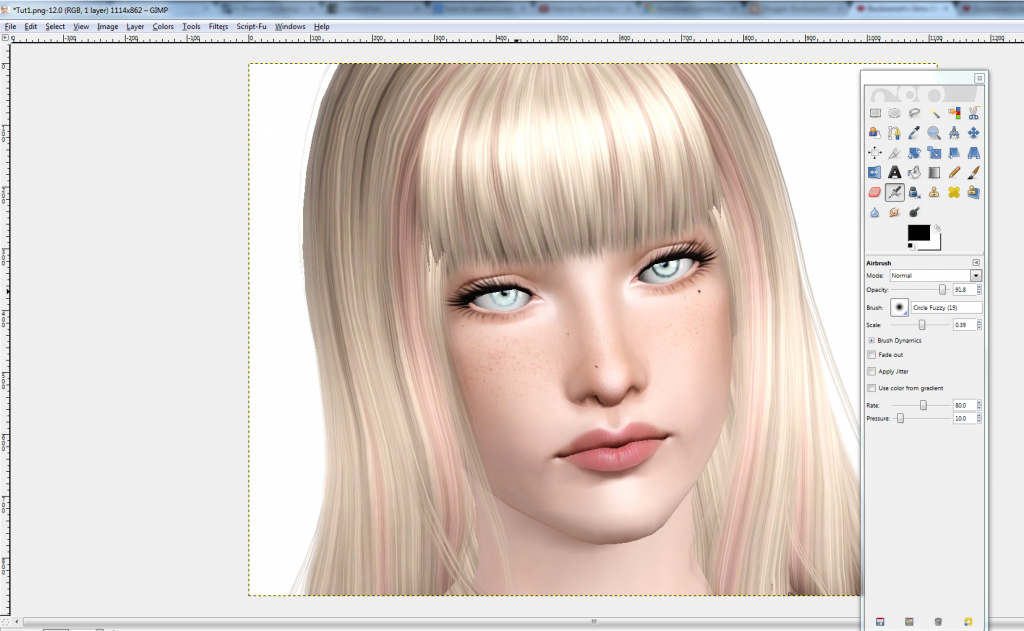
1. Open up a picture that you would like to edit. It would be best if it was up-close/headshot ;)

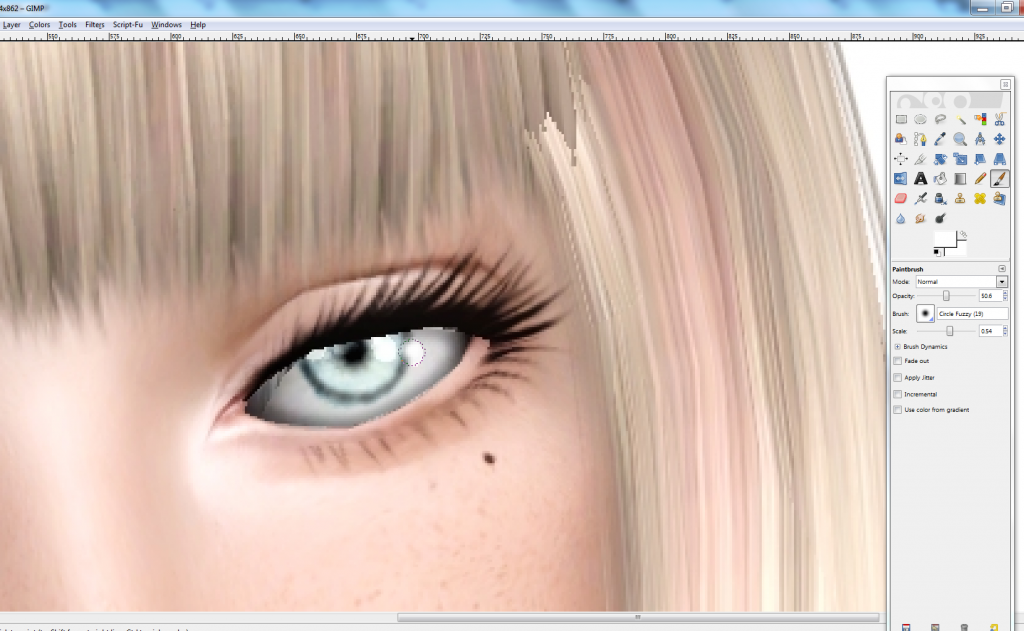
Using the Airbrush tool and using the Fuzzy Brush, set the color to black and set the opacity and size to your liking. I have set the opacity to 91.8 and size to o.39. No outline the iris to make it more defined.
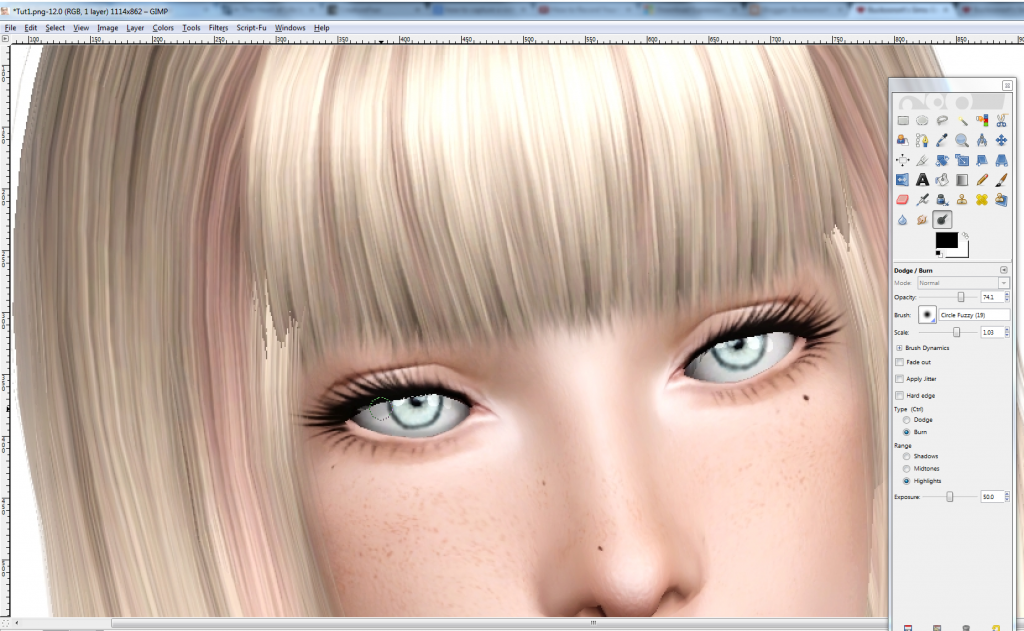
2. Take the Free Select tool and outline the inside of the eye.

Now take the Burn Tool and set it to Highlights. We will be adding shadows to the inside using the Fuzzy brush. Keep in mind where the light is coming from ;)
I have the opacity set to 74.1 and the size set to 1.03
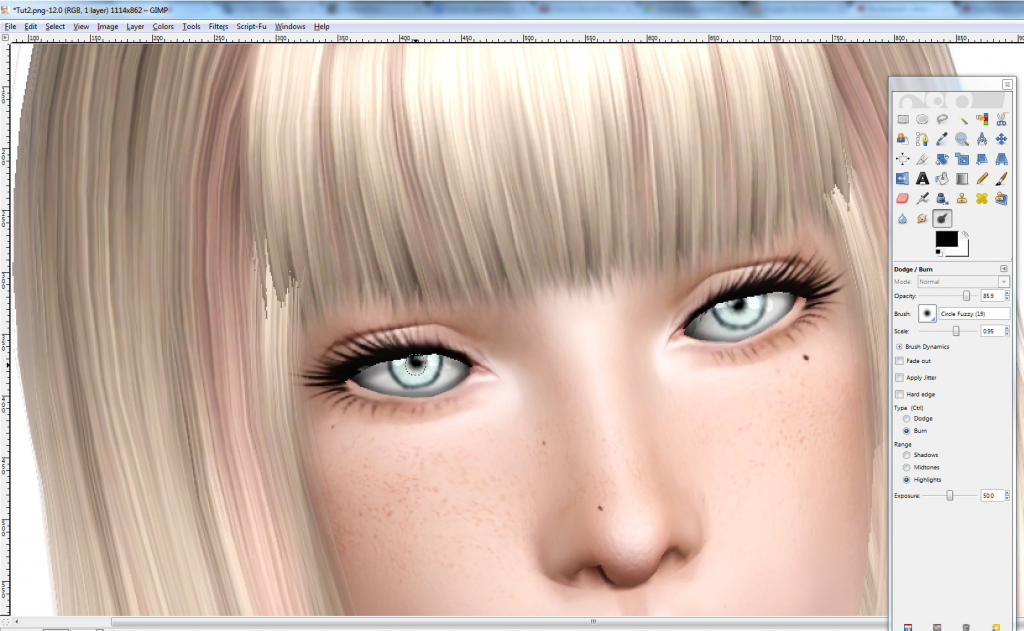
3. Using the Burn Tool again wit the Fuzzy brush, darken the pupil. I have the opacity set to 85.9 and size at 0.95
4. Now take the Paint tool, with the Fuzzy brush and change the color to white. We are going to enhancing the glares to make the bright :)
You are done!!
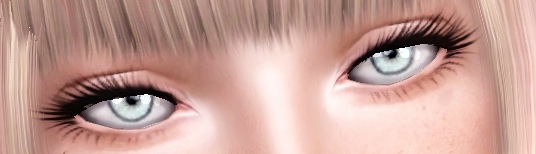
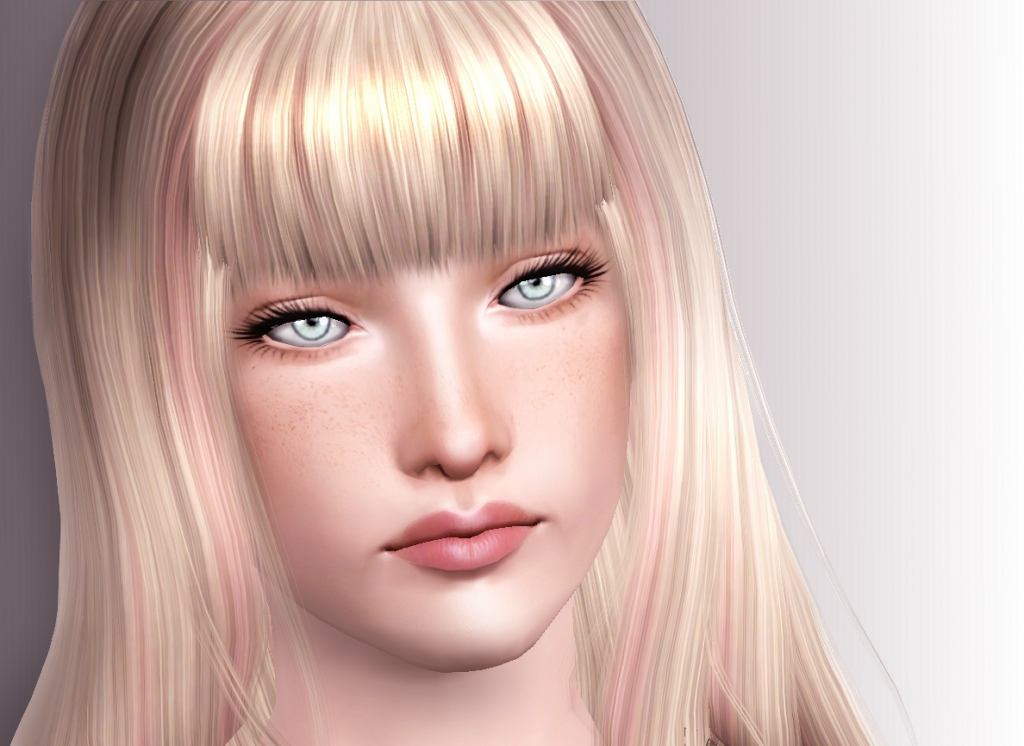
Before:
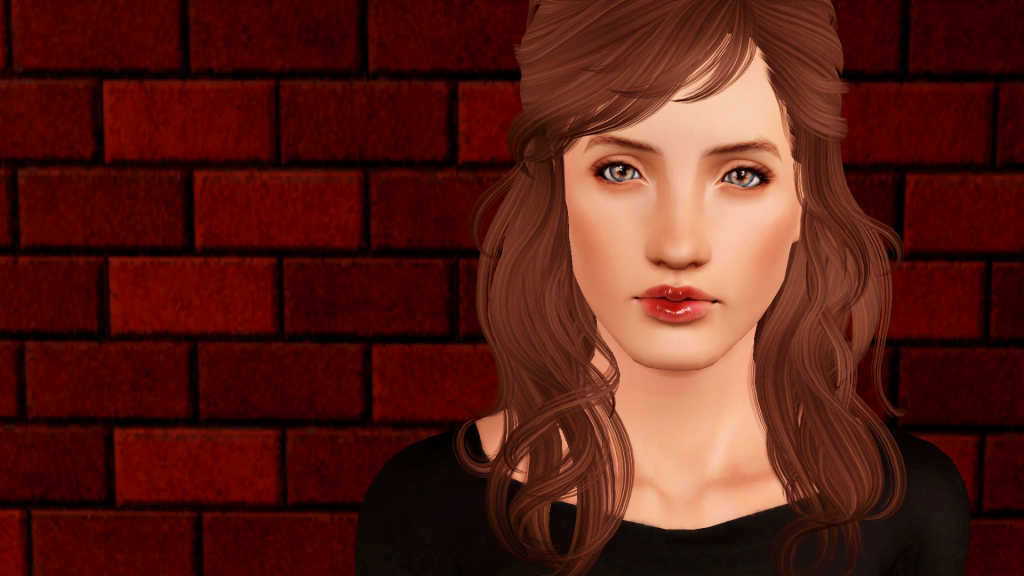
After:
I hope this helped you.. I would love to see some picture if you give this a go :)
Adding Gradients
This tutorial will show you how to add gradients to your picture using Gimp. Enjoy!
1. Open up an image of your choice.
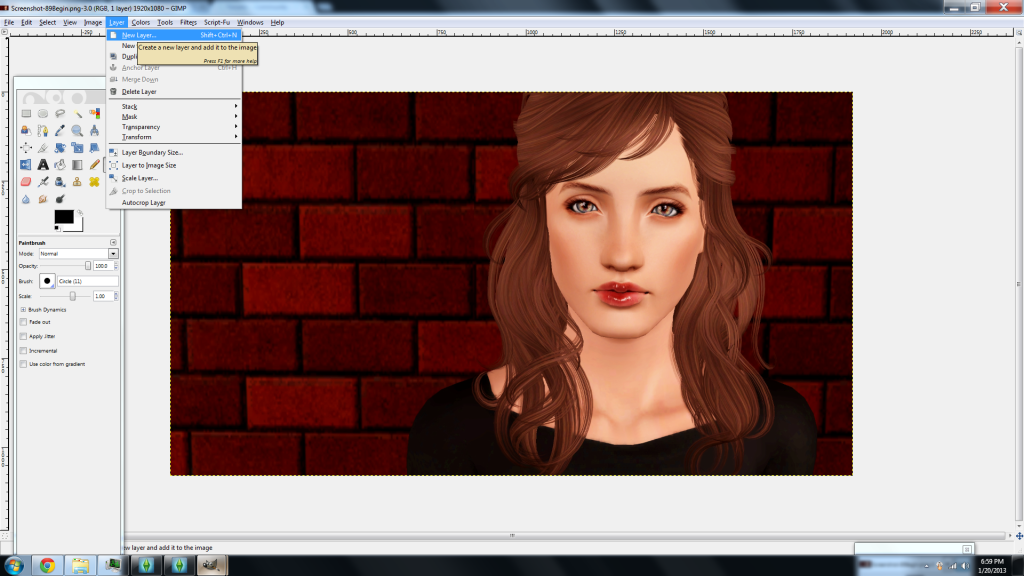
2. Add a new layer.
3. Go to Windows/Recently ClosedDocks and click on Layers Channels, Paths, Undo.
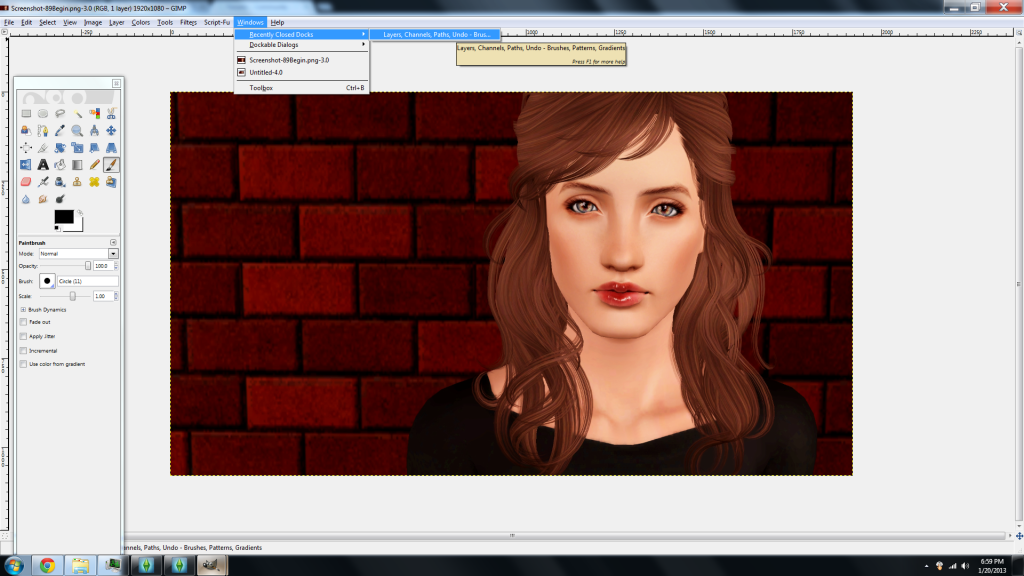
Once you have that open go to the first tab called Layers Dialog and where it says Mode change it from Normal to Overlay.

4. Now select the blend tool.
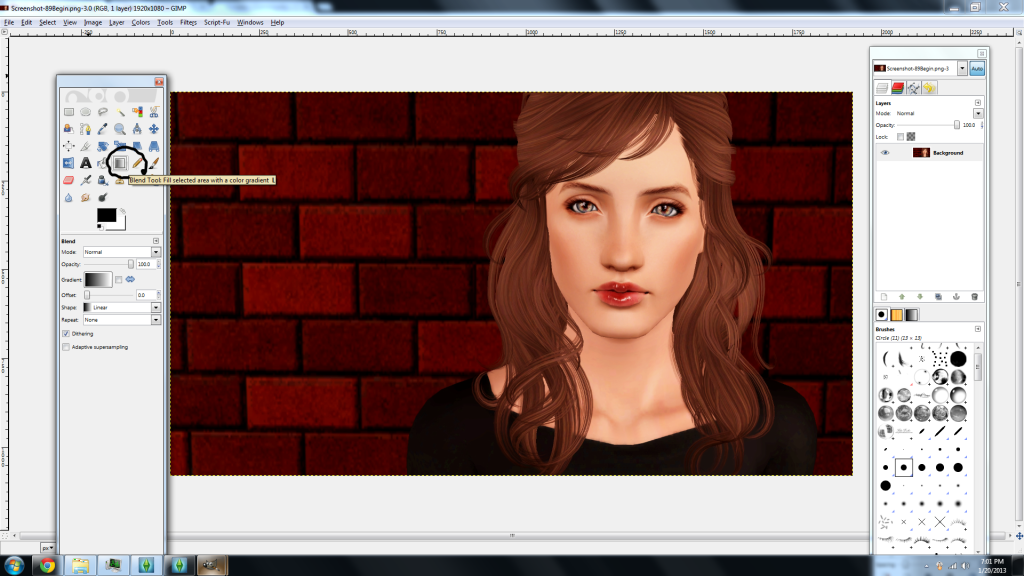
I have my colors changed to black and white so that my picture goes from light to dark. You can change the colors to your liking ;) I have also chanded the Offset to 24.4 which is how far out the black will go.

5. Now take your cursor and drag it across your picture like-so.
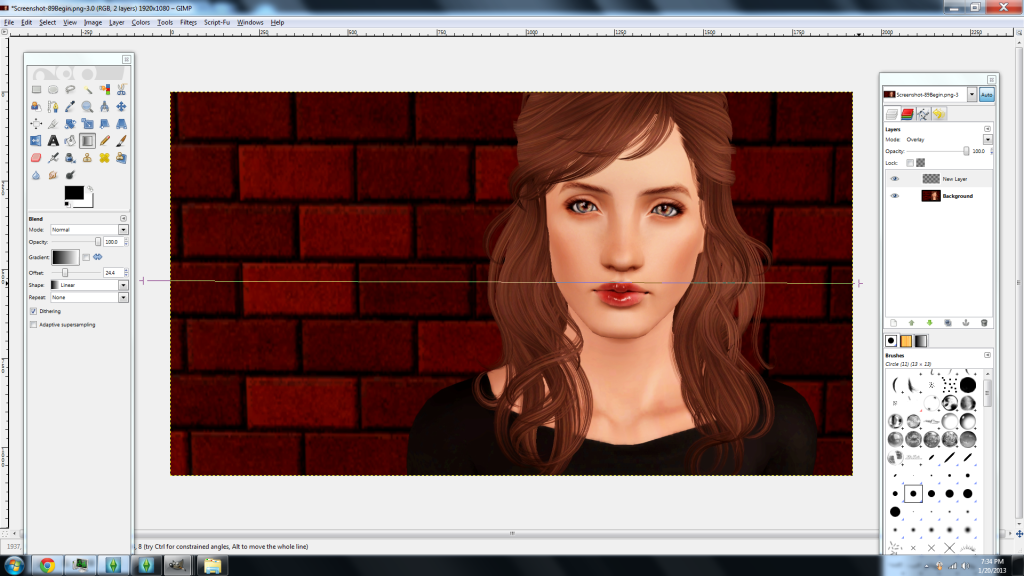
This will create a gradient!
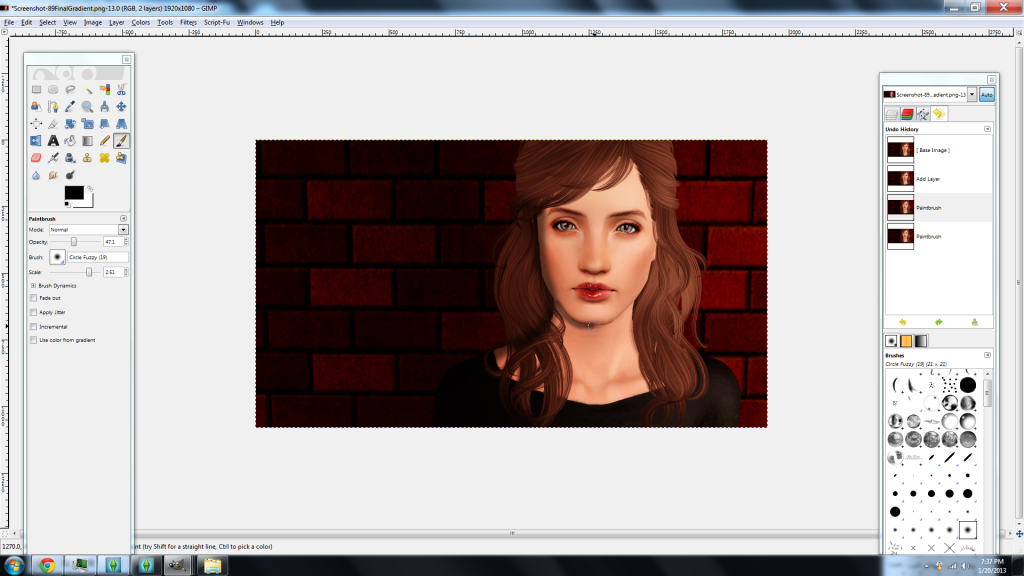
6. To make the picture more realistic, we will be adding a shadow. First add a New Layer again.
7. Using the Paintbrush Tool and The Fuzzy brush, add shadows around the face and neck like I have done. I have the Opacity set to 47.1 and the Size set to 2.51
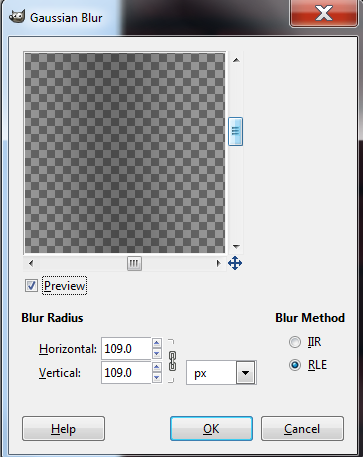
8. Now go to Filters/Blur/Gaussian Blur.
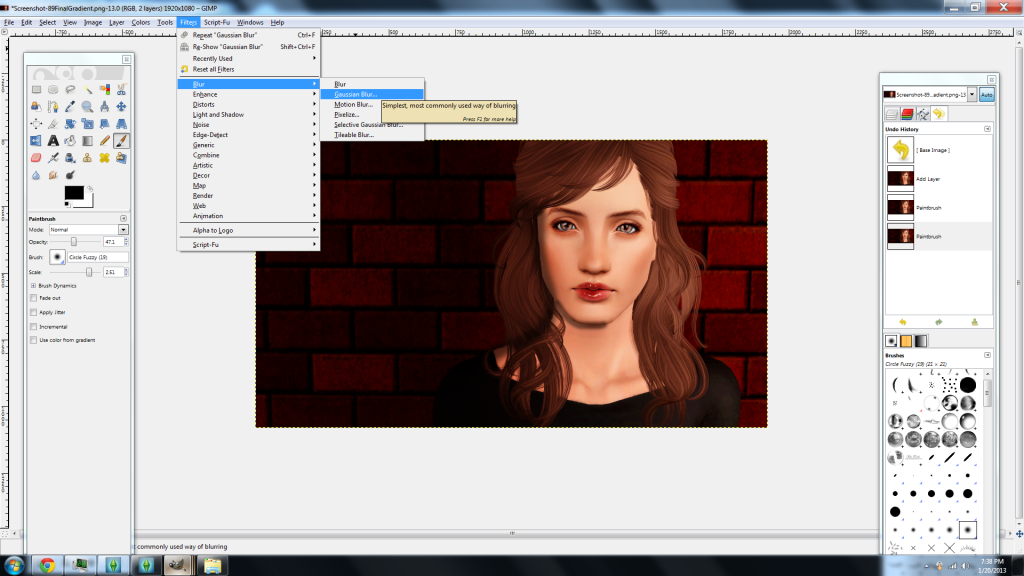
This will blur out the lines so that they aren't so harsh ;) I have it set to the following:
Now you're done! I hope you enjoyed this tutorial and maybe it helpe you. If it did, I would love to see a picture :D
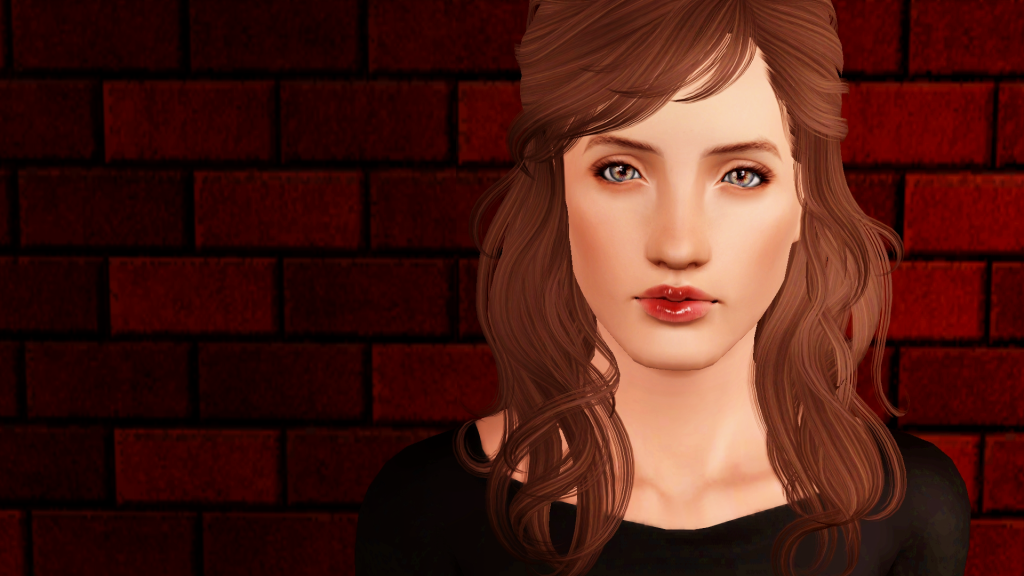
Before:
After:

No comments:
Post a Comment